I made this card to go with a shower gift for my niece, Sarah, who is due January 5. She is having a little girl named Avery. The card matches the gift that my sister and I made for her - a First Year mini scrapbook. Stay tuned for pictures of the scrapbook.
Directions on how to make a criss cross card can be found HERE on Splitcoaststampers. Just scroll to below the video at the bottom to get the directions on how to make the vertical criss cross card.
Supplies used:
American Craft cardstock
Bella Blvd Baby Girl pack
Punches: MS lace, SU! tab, Marvy scalloped circle (blue & pink punches)
SU! ribbon
Cricut Create A Critter cartridge
Glitter (bird is outlined)
Thanks for looking!
Carol
Monday, November 19, 2012
Monday, November 12, 2012
Folded Christmas Tree
The scrapbook store that I work at (The Embellished Scrapbook Boutique) had their annual Christmas Card Round Robin event this past weekend. The teachers make up card kits and our customers can go around the room and make as many of each card as they would like for $1.50 per card. This year we had 29 different designs and about 20 kits of each one (click on the above link to see the cards). This is one of the cards that I made for the event.
I found the pattern on Splitcoaststampers. You can find a tutorial HERE. I just found this tutorial today. It is a little different than how I did mine, but this will work for you.
Supplies:
WRMK Yuletide Red Plaid paper
American Craft rouge & olive cardstock
Gold glitter paper
WPlus9 Clear Cut Stackers Stars
WPlus9 Iconic Christmas (sentiment)
EK Success small star punch
MFT Fishtail dies
Spellbinders M-bossibilities folder
Thanks for looking!
Carol
For the Week Ending 11/18/12 Post 61
Saturday, October 20, 2012
You "Leaf" Me Breathless
This is a cute little freebie digital stamp that I downloaded from Whimsie Doodles. His name is Jayson. I made the card for my boyfriend who is currently in a long term care hospital about a half hour away from home. I thought it might cheer him up.
I colored Jayson with Copic markers and added a clear Spica pen to the leaves in the bag for a little sparkle. I also cut out the leaf bag from a second image and popped it up to give the card some dimension.
The patterned paper is from an old CTMH paper pack called Harvest. I punched some leaves from some freebie leaf punches my sister received years ago and randomly scattered them at the bottom of the card to look like a leaf pile. I also popped up a couple of the leaves.
Supplies:
Spellbinders Oval Nesties
Copic Markers
Spica Pen
Leaf Punches - unknown
CTMH Harvest Paper Pack
CTMH Cardstock
Jute from Menards
Thanks for looking!
Carol
Friday, September 14, 2012
Trombone Notes
When I saw the Brass paper from Moxxie's Musically Inclined paper line, I knew I had to use it in some way for spirit bags for my niece. She is in her high school marching band and will at some point during football season give spirit bags filled with goodies to her squad. Last year she didn't want her mom or I to do anything for her bags. This year she wants something cool. Getting her to tell us what that is is a different story. (She's 15 - that should explain it.) Every idea we throw out to her has gotten shot down. I did get her to agree to a notepad covered with paper. This is what I came up with:
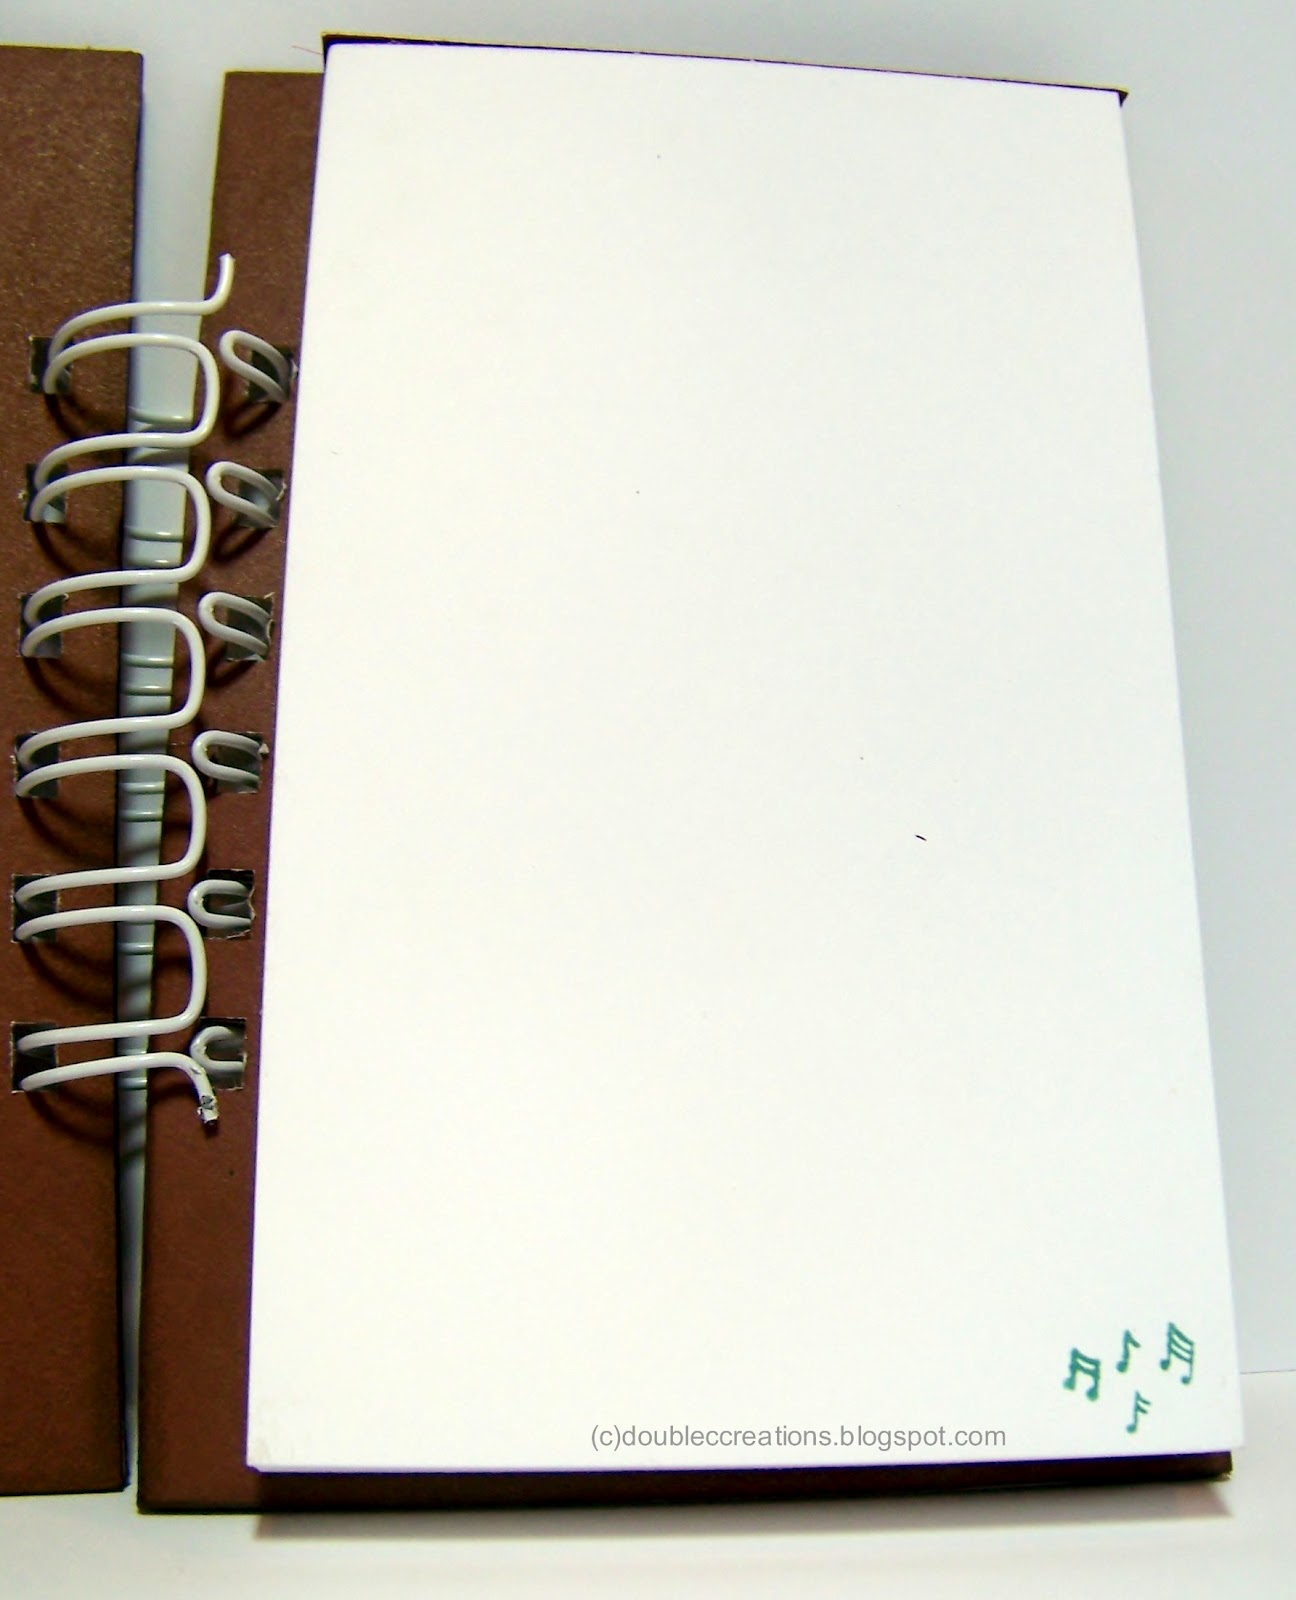
I had these little notepads in my stash. I cut 2 pieces of chipboard 1/4 inch longer than the length of the pad and 1/2 inch wider than the width. My pads are 3x5. I covered one side of each chipboard with the Brass paper and used CTMH pepperwood cardstock on the other side. On the back inside cover, I created a little pocket for the notebook to slide into. I didn't want this notebook to be a one time use type of thing when all the paper is gone. I used 3/4 inch wire to bind the book with my Bind-It-All. The trombone on the front is from the Cricut Quarter Note cartridge (my niece plays trombone). I cut the trombone from gold cardstock I got from Hollo's Papercrafts and backed it with juniper and pepperwood CTMH cardstock. The letters from "notes" is cut out using My Favorite Things Die-Namics By The Letters.
I stamped each page of the note pad with the music notes from the Pure Innocence Christmas Caroler stamp set in juniper CTMH ink. I only had to make four notebooks so it wasn't so bad.
My niece seemed to like these. I hope they make it into the spirit bags. If you have any other inexpensive ideas (besides candy) that high schoolers would like for their spirit bags, let me know.
Supplies
Chipboard
Moxxie Musically Inclined Brass
CTMH cardstock - juniper and pepperwood
notepad
Gold cardstock
Cricut Quarter Note cartridge
MFT By the Letters die
PI Christmas Caroler music notes
Bind-It-All wire
Rhinestones
Thanks for looking!
Carol
Friday, August 17, 2012
Shhh, It's a Secret - Password Book
We made this cute little internet password book for a friend's birthday. The book itself was all handmade. Cardboard was cut to 9 x 5 1/2 and covered with paper from CTMH. The cover paper was cut an inch bigger than the cardboard so that it could be wrapped around the cardboard. The front was decorated with ribbon before a complimentary piece of paper was cut to about a 1/2 inch smaller than the cardboard and placed on the other side of the cardboard to cover up the edges of the cover paper. (You can see a little bit of this on the picture of the tabs below).
The pages were created using Word and printed on a 8 1/2 x 11 cardstock (front and back) then cut in half.
An SU! punch was used to create the tabs and CTMH letter stamps were stamped to make the index. Here is where you can see a bit of the greenish diamond paper on the inside back cover of the book. Be sure to attach your ribbon before covering the inside back if you want to tie your book closed.
This is a picture of the back cover. The book was bound together using a bind-it-all. (Have had the machine for years and never used it!!) Ribbon was tied to the coils.
My Favorite Things Pure Innocence girls were stamped on 1 1/2 inch squares and colored using Copics. A bit a glitter was added to them and to the background paper.
SU! and CTMH ribbon was used as embellishments along with a strip of paper from the back cover.
If anyone is interested in the Word file for the pages, just e-mail and let us know.
Supplies:
CTMH paper
CTMH & SU! ribbon
MFT Pure Innocence stamps
SU! punch
Copics
Glitter
Cardboard
CTMH letter stamps
Bind-It-All
Thanks for looking!
Carol and Cheryl
Wednesday, August 8, 2012
Misc. Cards
I made these cards years ago as a birthday gift for a friend. I gave her a box of various all occasion cards. Only a few of my friends would I consider giving handmade cards to as I know they would appreciate them. I get most of my inspiration from Splitcoaststampers. They are a great resource and the members are always sharing templates and new ideas.
This card was hand cut from a template I found on Splitcoast forums. The sprinkles are brads. The cherry is from a punch then glossy accents added for shine. The cupcake wrapper is silver paper run through a paper crimper.
Just one of the many Eiffel Tower stamps that I own.
Another one that I found a directions for on Splitcoast. For the strawberry, after I stamped it, I colored a portion with a brown marker then added glossy accents to make it looked like it was dipped in chocolate.
A simple card with hand torn edges and the Happy Birthday cuttlebug folder.
Found a template on Splitcoast and modified it a little bit to fit on the card the way I wanted it.
Very simple thank you card using old Chatterbox paper and CTMH ribbon.
Thanks for looking!
Carol
Wednesday, August 1, 2012
Hibiscus Digi
This card was made with another digi stamp from Beccy's Place. She has a great selection of free digis and digis that you can buy.
I used the Gamsol Magic or Magic Colored Pencil Technique to color this image. Check out these great tutorials on Splitcoaststampers and Inky Antics. One of the things I love about this technique is that the shading is automatically done for you.
Supplies:
Beccy's Place Hibiscus digi stamp
Prismacolor pencils
Gamsol
Circle Nesties
Cheery Lynn doily die
Kassie's Brocade CB folder
Thanks for looking!
Carol
I used the Gamsol Magic or Magic Colored Pencil Technique to color this image. Check out these great tutorials on Splitcoaststampers and Inky Antics. One of the things I love about this technique is that the shading is automatically done for you.
Supplies:
Beccy's Place Hibiscus digi stamp
Prismacolor pencils
Gamsol
Circle Nesties
Cheery Lynn doily die
Kassie's Brocade CB folder
Thanks for looking!
Carol
Subscribe to:
Posts (Atom)